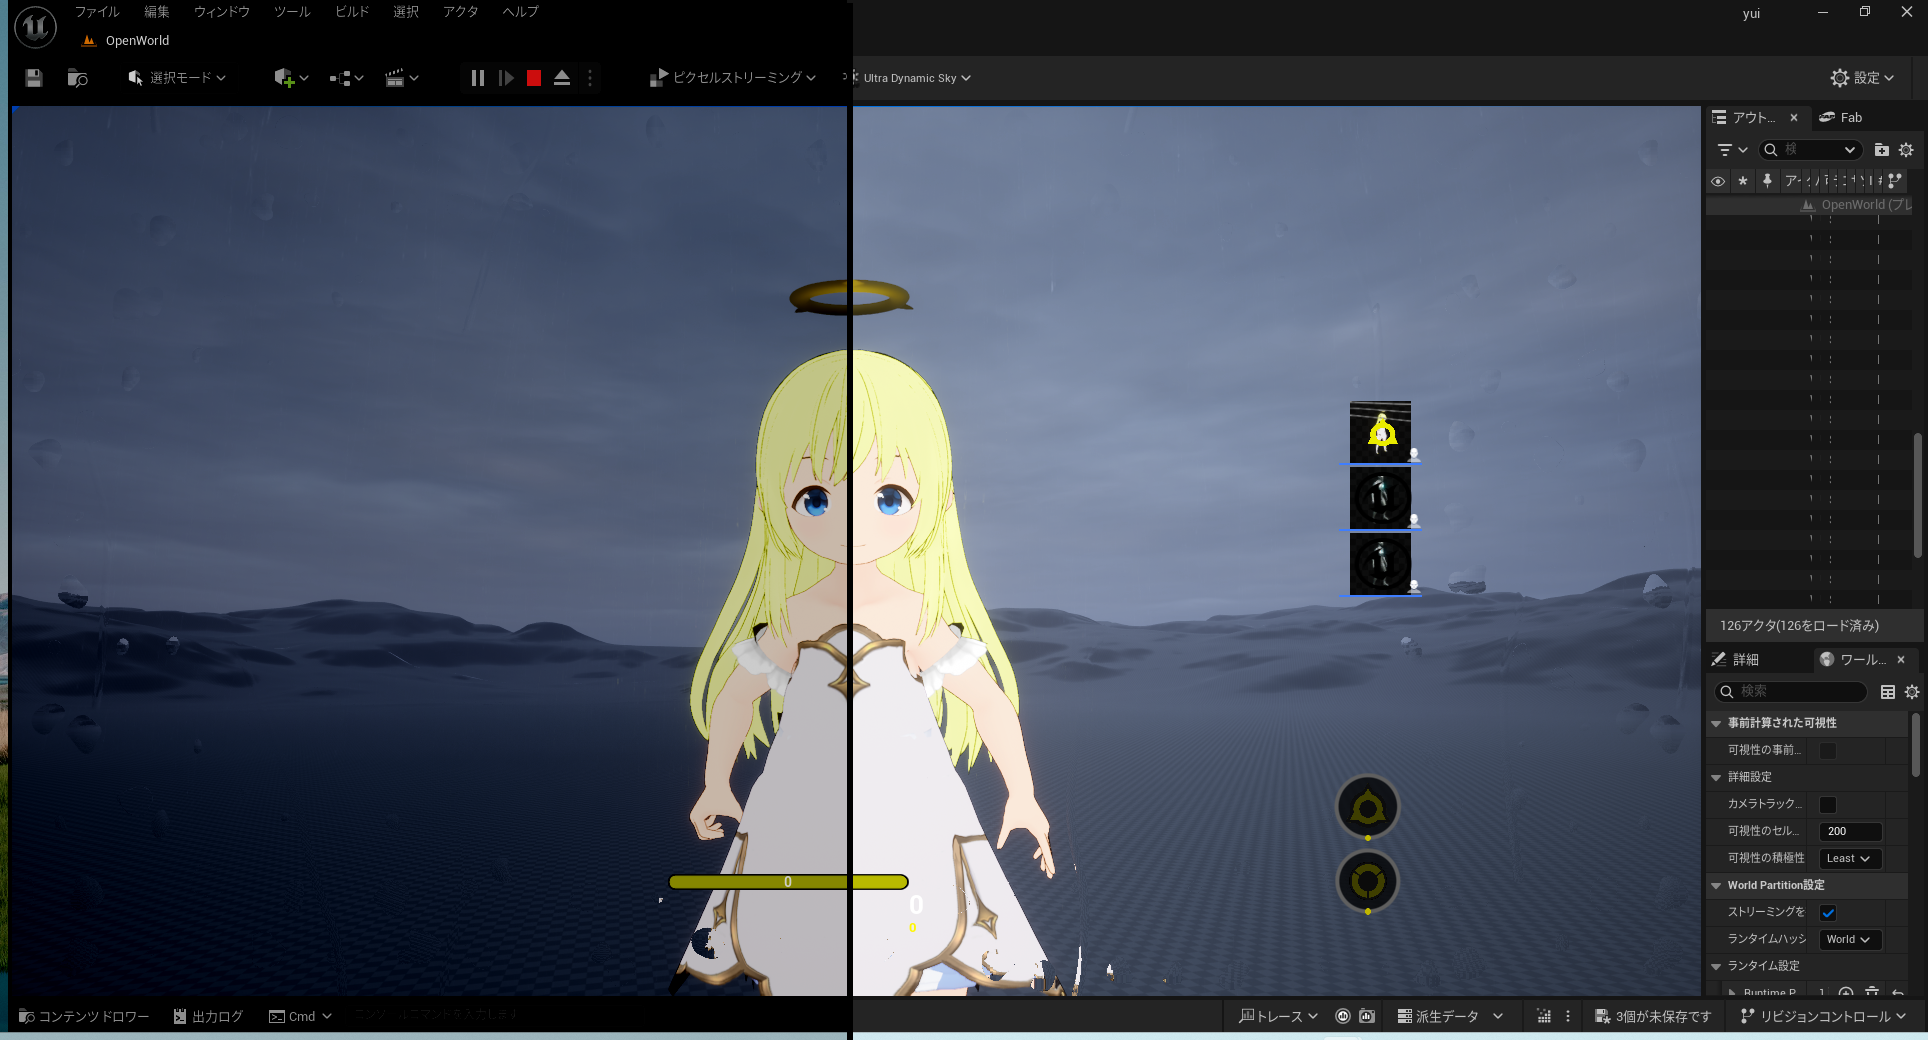
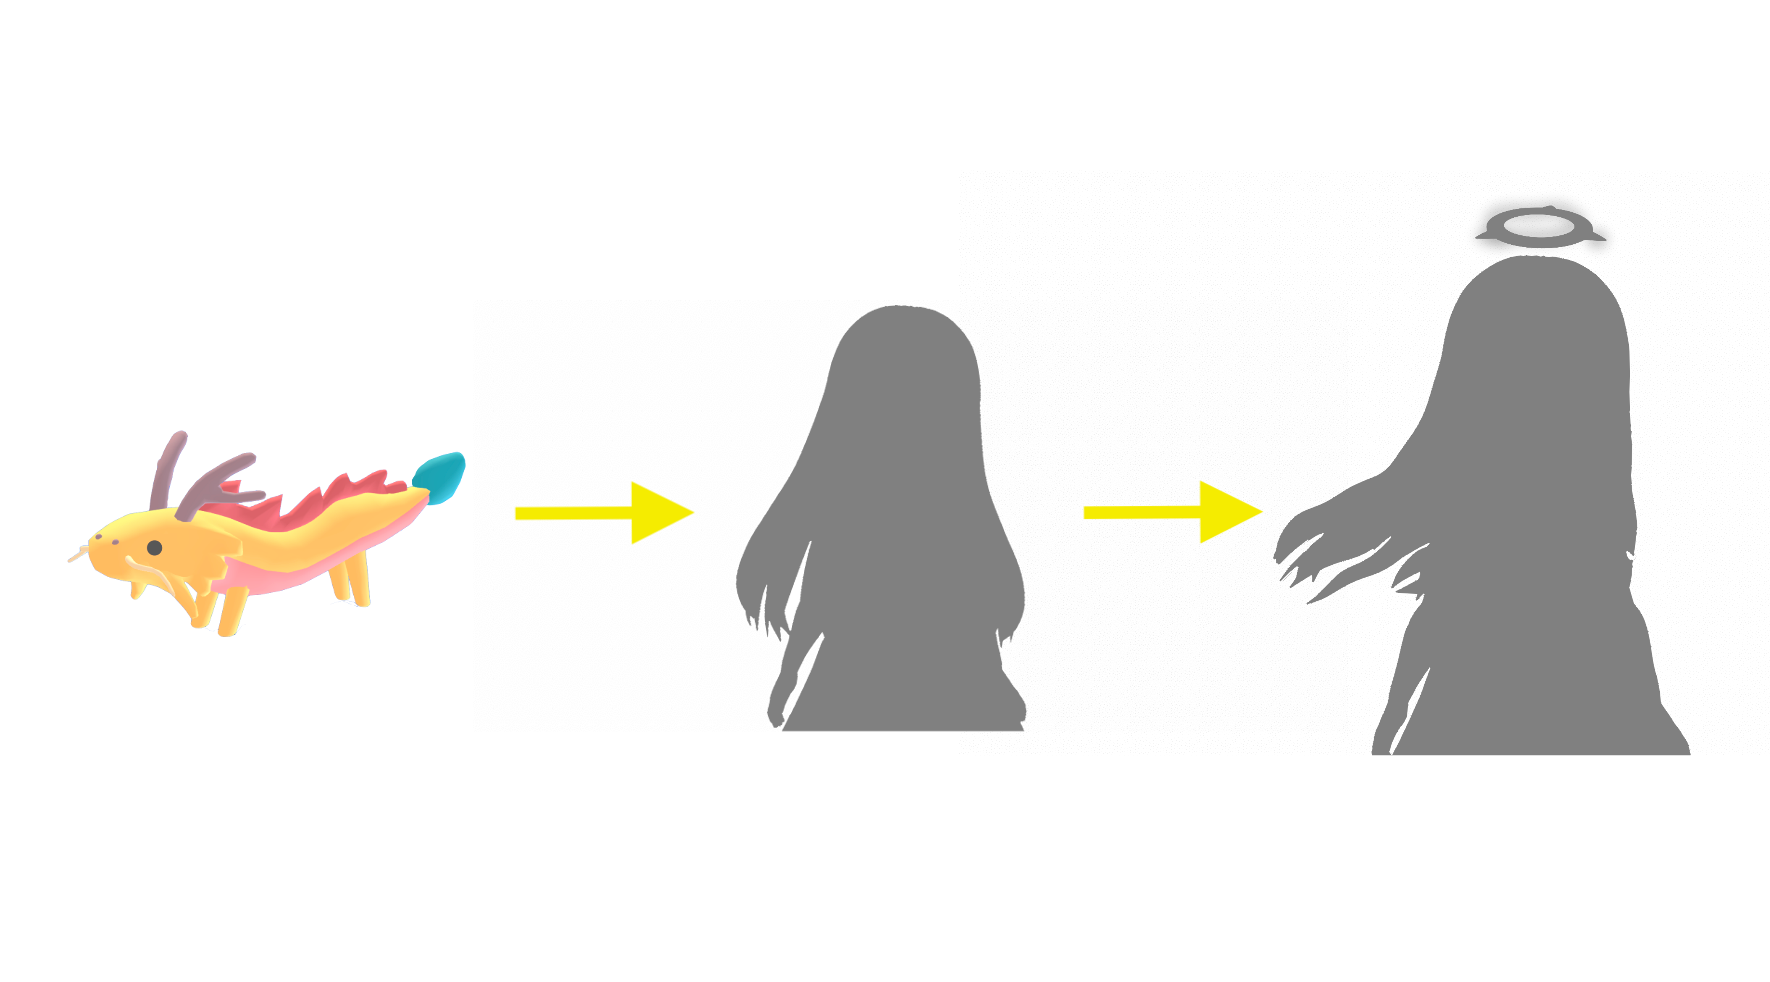
aiue
- universe : [ map, level, world ]
- character : player
- atmosphere : [ account, login, server ]
ゲームは様々なシステムから構築されています。全体をaiue systemといいます。
aiueはcharacter, universe, atmosphereにわけられます。例えば、characterにはyui system, evolution system, attribute systemなどがあります。
ref : https://www.youtube.com/watch?v=pr5krUVjQaM
universe
平面がベースになっているmapをplanet形式にすることを目指します。地上を離れて大気圏を抜けると宇宙に行くことができます。月は地球の周りを回っています。
city sample
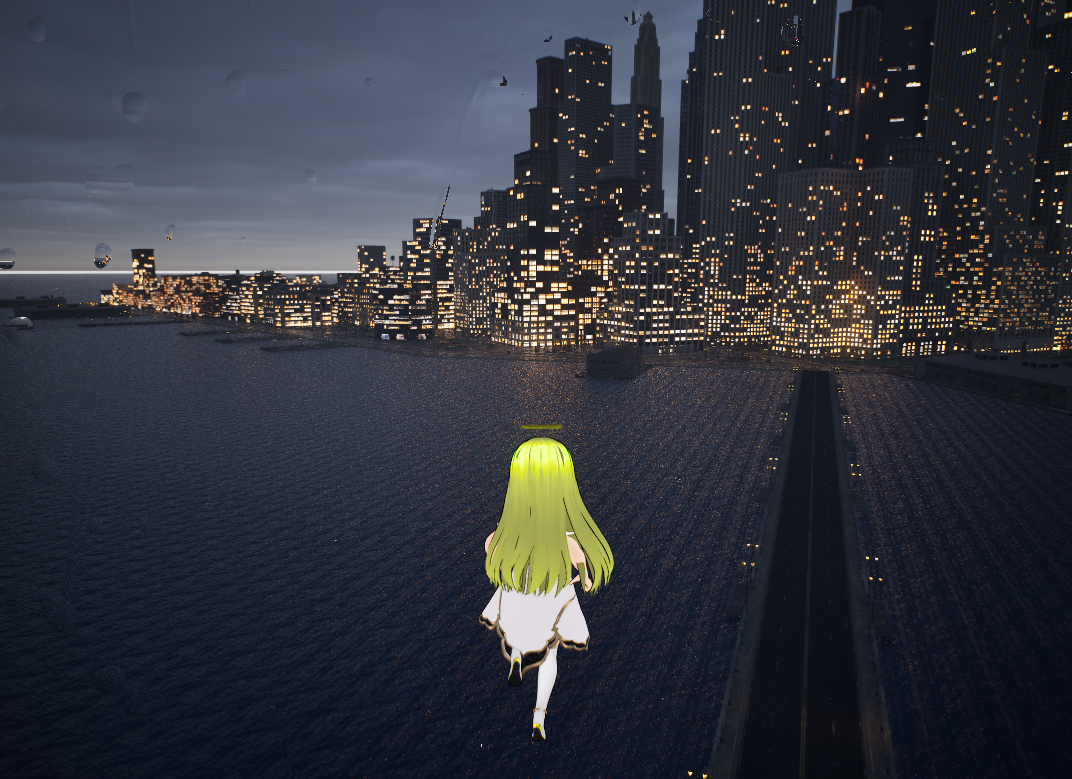
city sampleにsolar systemを組み込みます。具体的には惑星(planet)の形式でmapを作成し、空から宇宙に出ても問題ないようにすることを目指します。
- 海 :
ocean waves - 空 :
ultra dynamic sky
5.5からcrashする回数が大幅に減りました。ただし、city sampleは5.5ではbuildできません。 #36
また、build後にLumenのエラーが出ますのでファイルを削除します。 #40
CitySampleCookedEditor.Target.csも削除してください。
rm C:\Users${USER}\AppData\Local${project}\Saved\*.upipelinecache
rm CitySampleCookedEditor.Target.cs
次に初期mapの変更を行います。
/Map/Small_City_LVLを使います。ground*を探して削除します。これは海面にplane(平面)を設置しています。
プレイヤーがハイスピードで移動するとブレる(分身する)のはLightingandPost/PostProcessVolume_WPが原因なので削除します。
止まっている車をcで運転できるようですが、これはBP_Playerの機能です。使用するには後述するgame animation sampleに統合する必要があるでしょう。
playerstart(tag)をいくつか設置し、uiで選択してteleportできるようにします。instance data(config)に名前を保存して呼び出してもいいし、mapから値を取ってきてもいいです。
https://blueprintue.com/blueprint/3h8qi0ep/
いくつかの建物を追加します。
- /Levels/DefaultLevel
- /AutomotiveBridgeScene/Bridge_P
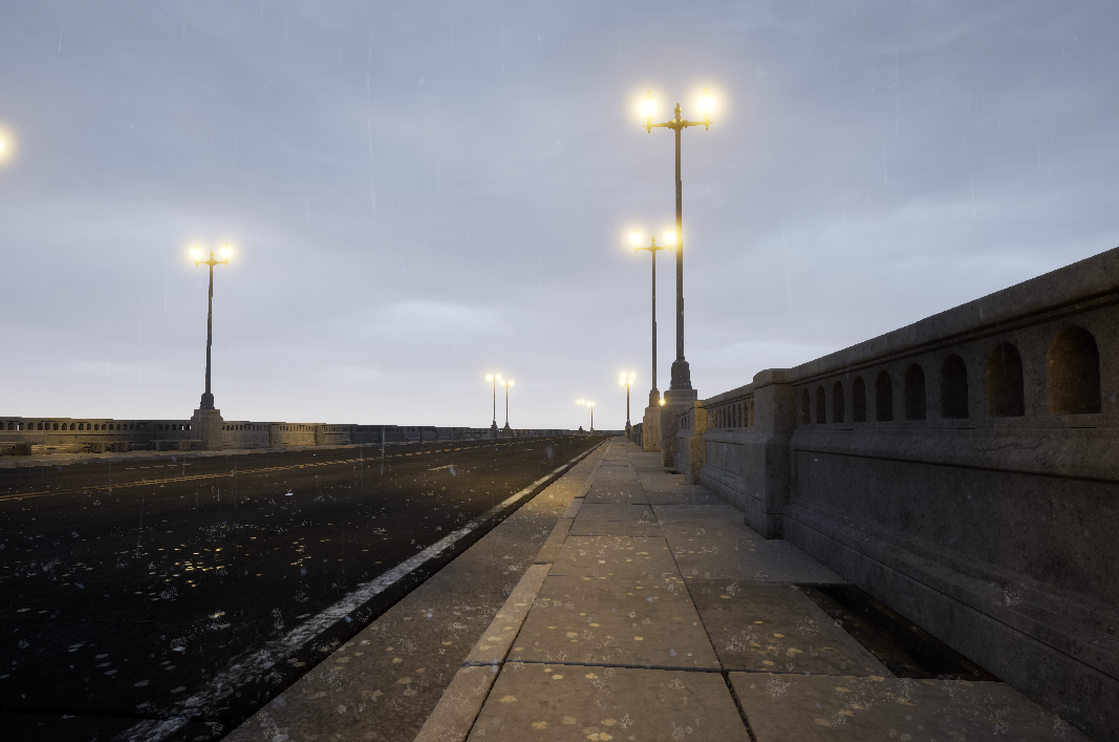
街頭はBP_CurvedBrideでLamp_0xを変更します。SMでstreetLampCを選択して位置を調整します。また、すり抜けるのでマトリックスでcollisionを設定してください。よくわからない場合は後述するtwinmotionを参考にしてください。
AutomatedPerfTesting
AutomatedPerfTestingは5.5で追加されたpluginです。
Experimental release of Automated Perf Testing Plugin v0.1, providing Gauntlet Test Controllers, UAT Test Nodes, and BuildGraph macros for adding common automated performance tests to a project's automated build and test.
- https://dev.epicgames.com/documentation/ja-jp/unreal-engine/unreal-engine-5.5-release-notes
- https://dev.epicgames.com/documentation/en-us/unreal-engine/API/Plugins/AutomatedPerfTesting
そのうち解消されると思いますが、現在(2024-11-18)、city sampleはbuildできません。Engine/Plugins/Performance/AutomatedPerfTestingにAutomatedPerfTestConfig.cs, AutomatedPerfTestNode.csが含まれていないため${project}/Build/Script/CitySample.Automation.csprojに記述されているcompileが通らないのです。
<Project Sdk="Microsoft.NET.Sdk">
  <Import Project="CitySample.Automation.csproj.props" Condition="Exists('CitySample.Automation.csproj.props')"/>

  <PropertyGroup>
    <TargetFramework>net8.0</TargetFramework>
  </PropertyGroup>

  <ItemGroup>
    <Compile Include="$(EngineDir)\Plugins\Performance\AutomatedPerfTesting\Build\Scripts\AutomatedPerfTestConfig.cs" />
    <Compile Include="$(EngineDir)\Plugins\Performance\AutomatedPerfTesting\Build\Scripts\AutomatedPerfTestNode.cs" />
  </ItemGroup>

</Project>
これはgithubにあるsrcから持ってくるしかありません。アクセスするにはorgに参加します。
# example
$(EngineDir) = C:\Program Files\Epic\UE_5.5\Engine

# copy file
$(EngineDir)\Plugins\Performance\AutomatedPerfTesting\Build\Scripts
    ├──AutomatedPerfTestConfig.cs
    ├──AutomatedPerfTestInsightsReport.cs
    └──AutomatedPerfTestNode.cs
また、buildする際はCitySampleCookedEditor.Target.csを削除してください。
ocean waves
惑星の海を作るにはocean wavesを利用します。必要なものは以下の2つです。
- BP_EarthSizedOcean : 海中
- BP_EarthSizedSphericalMesh : 海上
- WaterVolume
BP_EarthSizedSphericalMeshのtransform-location-z:-63600000.0にします。Sphere Radius:63600000.0にします。SphereEdge Length:16000000.0になるはずです。
次に海上の影問題を修正するためMaterial Overridesの-1から4までのmaterialを変更します。私は/Vefects/Water/VFX/WaterMaterialsを使用しました。
次にBP_EarthSizedOceanのVolume MaaterialsでWaterVolumeをセットします。Above, Underwaterを/Vefects/Water/VFX/UnderWaterに変更します。heightは0にします。これは海に入って出たときに海中を適用する高さを設定します。
これで正常に海を作ることができました。
主な遅延原因はocean wavesになります。できる限り非表示にするのが望ましいです。
ultra dynamic sky
ultra dynamic skyは空と天候を作ります。
まずblueprintを開いてHeightFogを変更します。これは霧を地平線に表示するものです。
HeightFog->Fog Max Opacity:0.0
その他、天候をいい感じにするには以下を設定します。
[Ultra Dynamic Sky]
Time Speed: 6.0
Volumetric Cloud Rendering Mode: Full Cinematic Quality

[Ultra Dynamic Weather]
Weather Speed: 10.0
Random Weather Variation: Random
Random Weather Change Interval min:10
なお、遠いところから惑星に入るとプレイヤーが停止する問題が残っています。 #27
earth
ultra dynamic skyにBP_Planet_Terranを追加します。transformのlocation-z:-636000000, scale-xyz:6360000にします。最初はSkyAtmosphereに入れて調整しましょう。惑星の中心に来ればokです。なお、親子付けを解除しないとプレイヤーが移動しても同じ位置に固定されます。背景が動かないということです。最終的にはmapに置いたほうがいいです。値は以下のようになるので貼り付ければ完了します。なお、BP_Planet_Terranはmapから持ってこないとcloudの品質がよくありません。
/Space_Creator_Pro/PlanetCreator_1_V2/Blueprints/BP_Planet_Terran
 - location-x:20623159.823879
 - location-y:-3864006.829533
 - location-z:-636000000.0
 - scale-xyz:6360000.0
ultra dynamic skyのCurrent Stars Colorは上空:0.1, 宇宙空間:0.75, 地表付近:0.0を示す値があります。これを使用することで、ocean, cloud, earthなどの表示を調整できます。これはプレイヤーのパワー調整にも役立ちます。地上は1, 上空は100, 宇宙は1000にすれば移動が楽になります。
https://blueprintue.com/blueprint/qk8jt6fm
また、横から惑星に入るとキャラクターの動作が停止する問題がありますが、これは平面ベースにmapが作成されているからだと思います。緩和策は以下のとおりです。
ocean wavesのBP_EarthSizedSphericalMeshを惑星の中央に持ってくるためlocation-z:-6360000000.0にします。ただし、ultra dynamic skyのatmosphrerと合わなくなり、海面が宇宙空間に突き抜けます。
planetary oceansというassetは売られています。扱うのは難しそうですが興味があります。
https://www.fab.com/listings/ea195c94-00af-43fb-bb1d-85a478320a27
rain
rain, snowなどのweatherではpostprocess volumeを使って画面に水滴を付けるなどの表現を行います。
[PostProcess Material]
/Vefects/Waters/Water/VFX/WaterOnSurfaces/Materials/MI_VFX_WaterOnLens_ClearCenter
/Vefects/Waters/Water/VFX/Rain/Materials/MI_VFX_CheapRain
twinmotion
建物はtwinmotionから持ってくるとよいでしょう。datasmithでexportしてueでimportします。指示通りにproject rootを指定すると/${name}_Assetsが作成されます。ただ、datasmithの置き場所は変更しても構いません。
すり抜け問題を解消するにはmeshを全選択して、右クリックでアセットアクション -> プロパティマトリクスで選択内容を... -> collision complexity(use complex collision as simple...)を選択します。
browser
まず下記のmaterialをBP_browserに追加したwidget componentで呼び出します。collisionでcontrolします。
chair
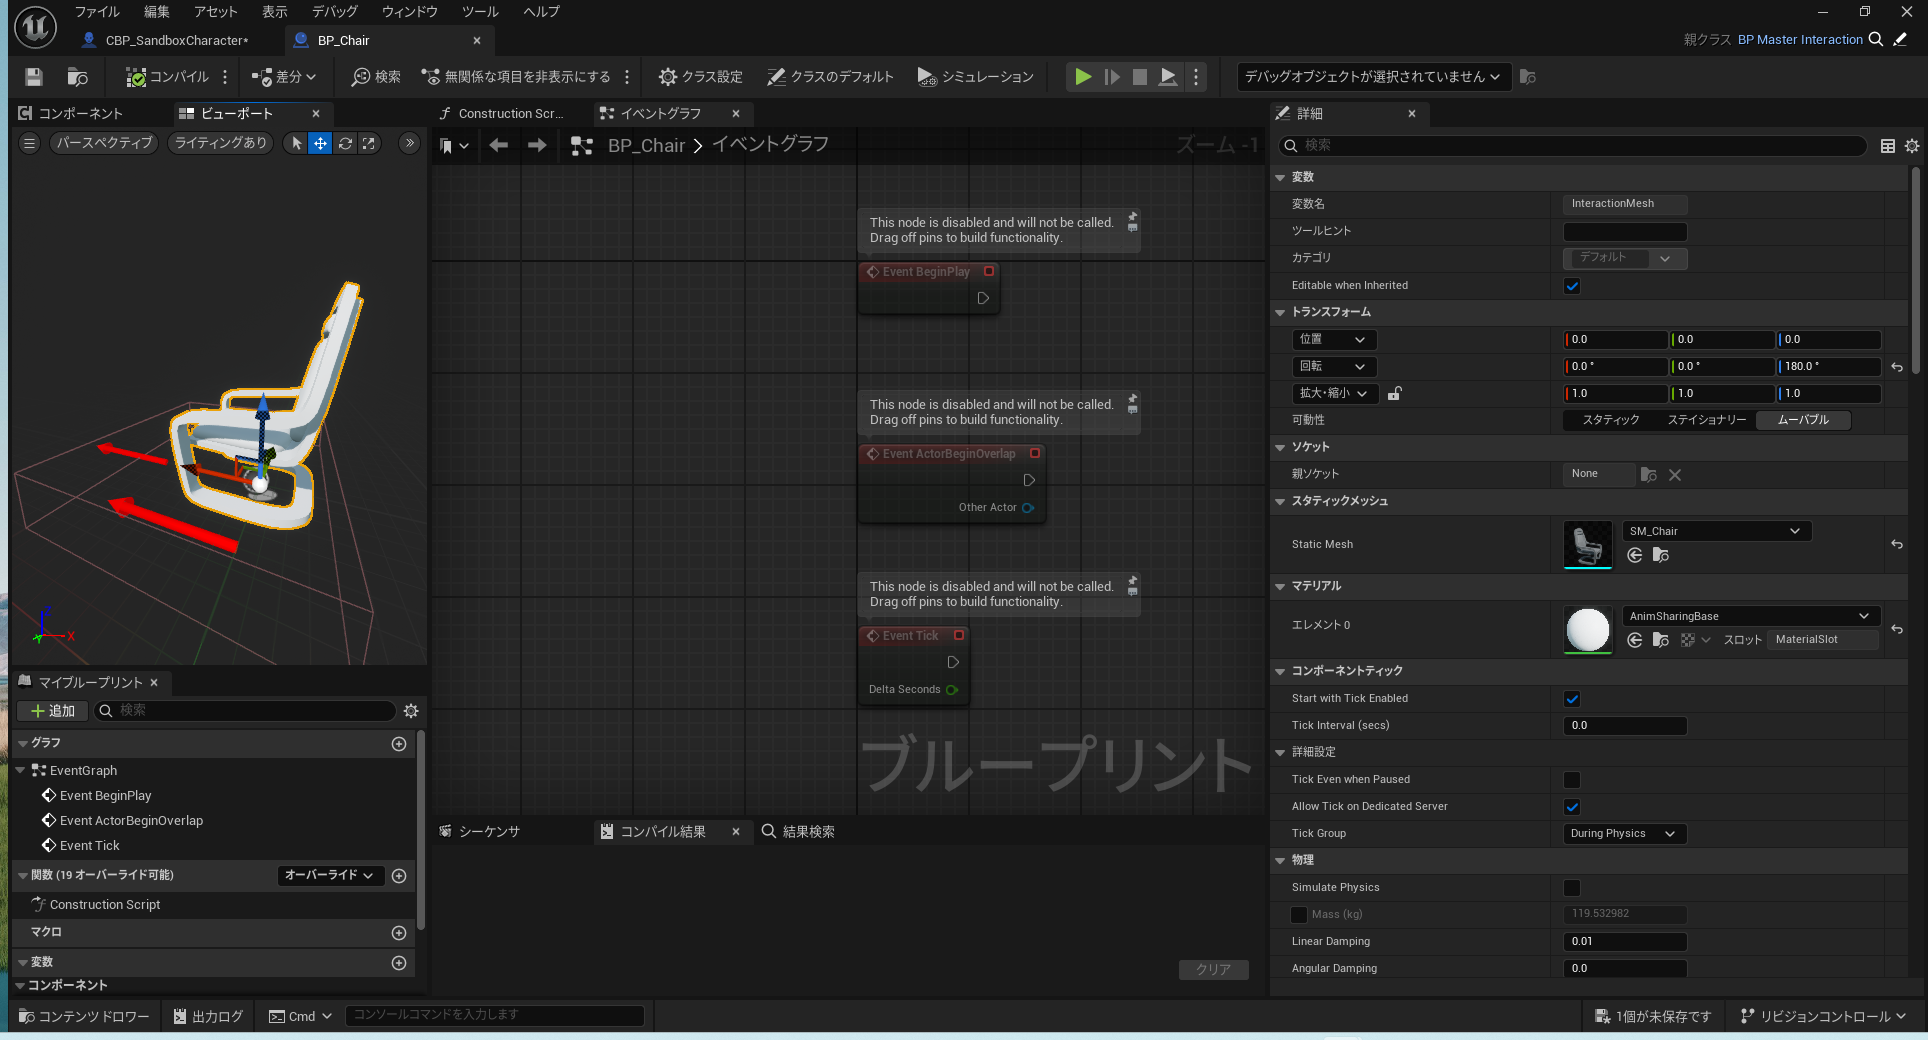
椅子に座る動作を設定します。大変ですが以下のcomponentを使うと簡単にできます。調整は難しいですね。私の場合はgame animation sampleを使っていますが、最新版では勝手に動きが制御されるためanim montageをそのまま再生できません。したがって、別にabpを作成し、それを呼び出します。
その後、動作が気に入らなかったためReplicated Interaction Kit Vol 3を購入しました。用意されているものをすべて使わないと設定できません。具体的にはBP_Chair, BP_InteractKitVol3, ABP_Manny, BP_ThirdPersonCharacterです。
まずcomponentをCBP_Characterに入れて、ABPを呼び出し、keyを設定します。なお、anim montageはcomponentの方にも別のものを設定できますので、キャラによって背丈などが合わない場合には個別に設定します。
https://blueprintue.com/blueprint/9e2ls2nx/
用意されているanim montageは後ろ向きになっているため、animを180度回してから録画して新たに作ります。この際、高さなども調整してください。anim montageはloopさせるため、立ち上がり(front_end)が反対になってしまいます。これはBP_Chairにある矢印方向を180度回せばokでした。
character
アニメ調のキャラクターを自由に動かせるようにします。game animation sampleをもとに構築します。キャラクターは3つのsystemで構成されています。yui, mode, attributeです。
game animation sample
custom : https://github.com/PolygonHive/GASP-ALS
/Blueprints/RetargetedCharacters/ABP_GenericReatagetで変数のIKRetargeter_MapにてRTG_UEFN_${name}を追加します。CBP_Sandbox_Character_${name}を作ります。開いてsk(Manny)などにあるComponent TagsにRTG_UEFN_${name}を追加します。最後にGameMode : GM_Sandbox > Bone : CBP_SandboxCharacter_${name}を指定して起動すればokです。
- /Blueprints/RetargetedCharacters/ABP_GenericReataget :
IKRetargeter_Map - /Blueprints/RetargetedCharacters/CBP_Sandbox_Character_${name} -> sk -> Component Tags:
RTG_UEFN_${name}
GAS(game animation sample)は現在、コンポーネントが不定期に初期化される問題があります。 #46
もしいつの間にかダッシュができなくなっていたらCBP_SandboxCharacter_$nameのEvent Beginが有効になっている可能性があります。これは削除しなければなりません。 #50
apiからキャラクターを最初に読み込むためには/Blueprints/CBP_SandboxCharacterのEvent Beginに書く必要があります。しかし、この処理は何度も呼ばれるため工夫が必要です。
https://blueprintue.com/blueprint/ch54mtzm/
階段でのめり込む問題があります。これは/Blueprints/ABP_SandboxCharacterでAnimGraphの中からFoot Placementを探す。そこで骨盤(pelvis)の悪態道補正モードをSudden Motion OnlyからComponent Spaceにします。 #49
superhero fligth animations
飛んでいる時は/SuperheroFlight/Blueprint/Characters/ABP_Player_UE5を使います。
Set Anim Instance Class(Mesh) --> ABP_Player_UE5
game animation sampleとの統合はPre CMC Tickの処理を解除するところからです。主にABP_Sandboxに戻すための処理で、飛ぶときにABP_Player_UE5を呼び出す場合は動きがおかしくなります。Flying Funcを呼び出していないときに有効にします。
https://blueprintue.com/blueprint/thxeju-z/
- Flight Braking Deceleration : 小さいと飛行後にダウンタイムが発生
- Sprint Fly Speed : 基本スピード
- Sprint Acceleration : 徐々にスピードを上げていく値。大きいとすぐに最高速に達する。小さいとカメラ追従が遅延する
animal
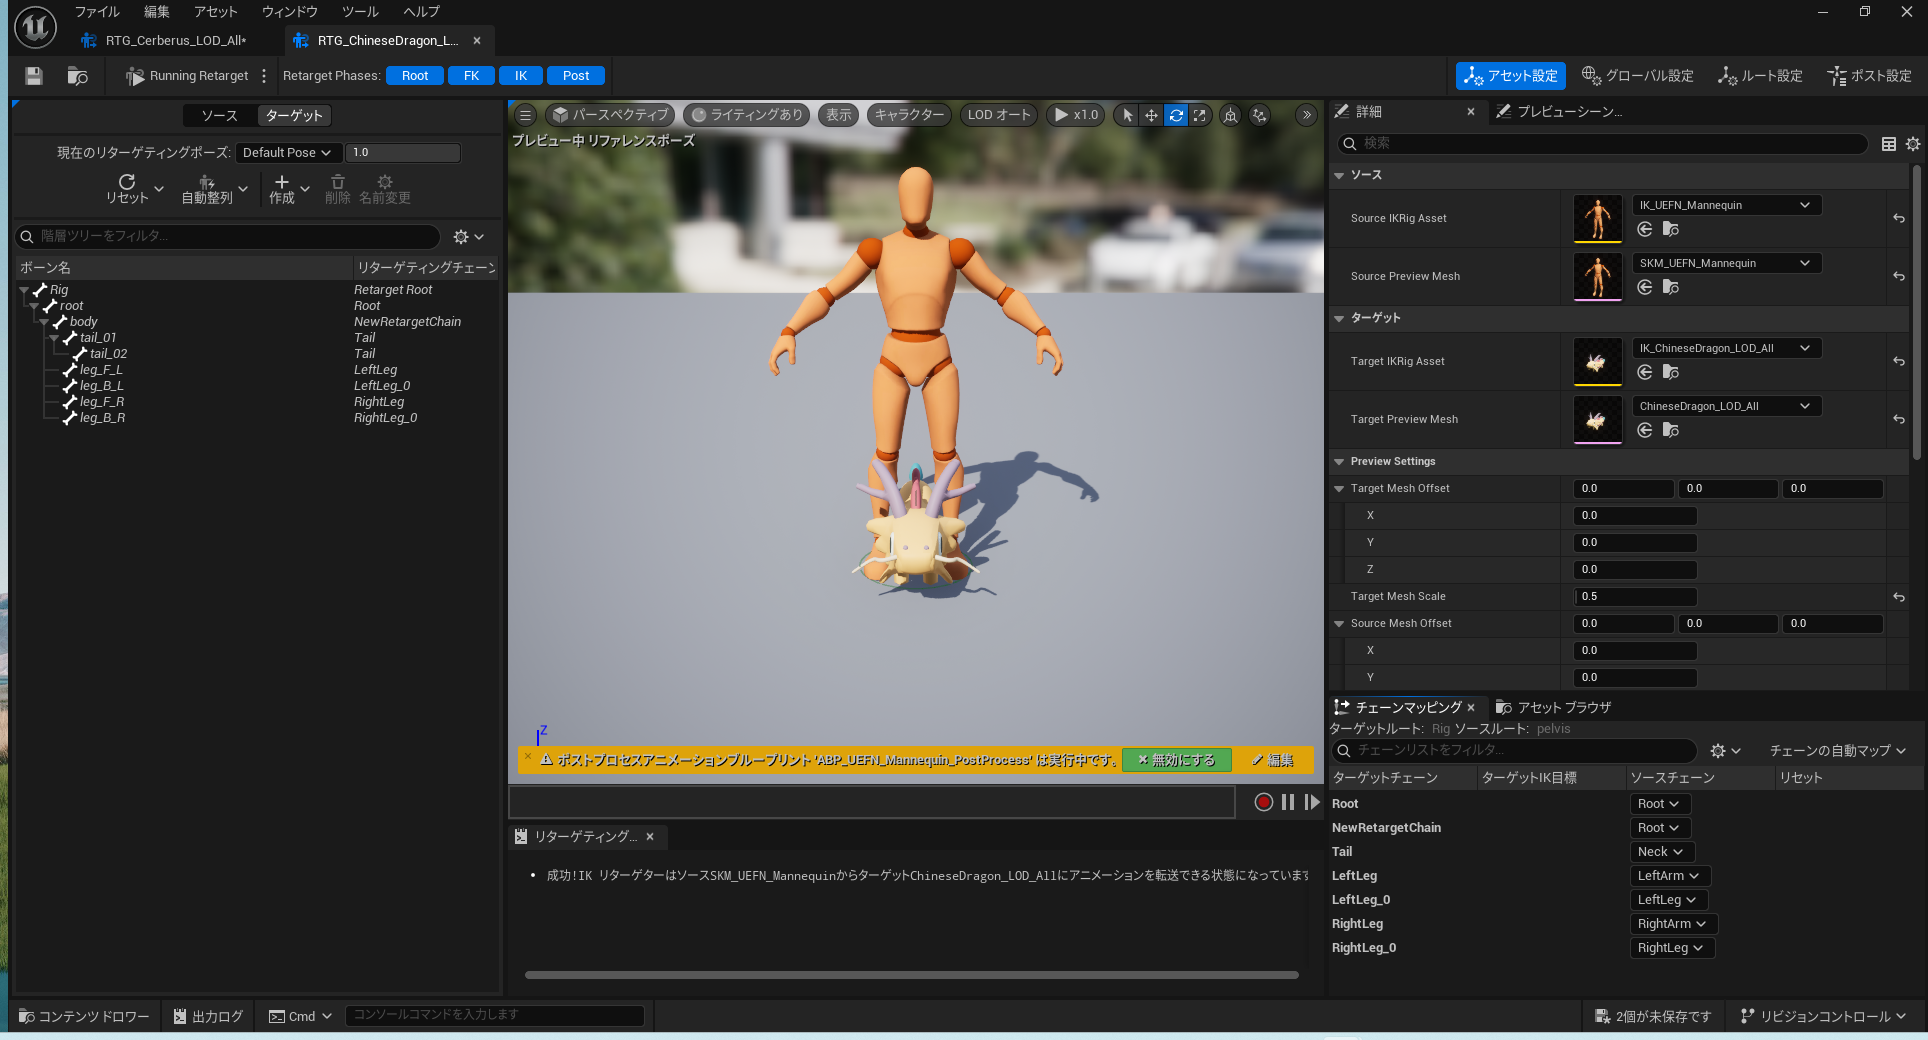
動物モデルのアニメーションを考えます。まず、SK_MeshからIKリグを生成します。そして、Retarget Rootを作り、それぞれの箇所に割当を行います。
次にIKリグからRTG(IKリターゲット)を生成します。SourceにIK_UEFN_Mannequinをセットします。次にTarget Mesh Scaleを0.5くらいにして、ルート設定からスケール垂直を0.0にします。チェーンマッピングは適当に考えます。
これでGASで動かせるようになります。
しかし、動物モデル用にABPを作成するのが最も良い方法です。今のままでは動きがぎこちないので。
vrm4u
vrm-1.0を使用します。
構築方法はベースにSSSProfileを使用します。次にunlitで生成したskをもとに/Plugins/VRM4UContent/Util/Actor/PostShadow/BP_PoseCopyToonでcustomを生成します。詳しくは/Plugins/VRM4UContent/ImportDataSet/DS_VRM_Customを見てください。
/Blueprints/CBP_SandboxCharacterでskにVrmPoseableMeshを追加してcustomで作ったskを当てます。次にBP_VrmOutlineComponentを追加して同じくcustomやunlitなどを当て、設定にてCommon Width:0.05, Use Common Material:trueにします。
- /Plugins/VRM4UContent/Util/Actor/PostShadow/BP_PoseCopyToon
- VrmPoseableMesh
- BP_VrmOutlineComponent
前髪が浮いてしまう問題はVM_${name}_VrmMetaを開き値を変更します。 #38
[
  [
    {
      "bone Name": "J_Sec_Hair1_03",
      "Hit Radius": 0
    },
    {
      "bone Name": "J_Sec_Hair2_03",
      "Hit Radius": 0.01
    },
    {
      "bone Name": "J_Sec_Hair3_03",
      "Hit Radius": 0.01
    }
  ],
  [
    {
      "bone Name": "J_Sec_Hair1_04",
      "Hit Radius": 0
    },
    {
      "bone Name": "J_Sec_Hair2_04",
      "Hit Radius": 0.01
    },
    {
      "bone Name": "J_Sec_Hair3_04",
      "Hit Radius": 0.01
    }
  ],
  [
    {
      "bone Name": "J_Sec_Hair1_05",
      "Hit Radius": 0
    },
    {
      "bone Name": "J_Sec_Hair2_05",
      "Hit Radius": 0.01
    },
    {
      "bone Name": "J_Sec_Hair3_05",
      "Hit Radius": 0.01
    }
  ]
]
20241213では値が変化していました。この場合は以下のような調整を行います。
(1)前髪が跳ねる, (2)飛んだときに後ろ髪の左右が爆散する
    {
      "bone Name": "J_Sec_Hair2_03",
      "Hit Radius": 0.0
    },
    {
      "bone Name": "J_Sec_Hair1_09",
      "Hit Radius": 0.01
    },
    {
      "bone Name": "J_Sec_Hair1_10",
      "Hit Radius": 0.01
    }
キャラクターの手を変更するにはRTG_UEFN_${name}を編集して、以下の値にします。
RightArm : IK false
LeftArm : IK false

[回転のアルファ]
親指 : 0.5
" : 0.4
" : 0.3
" : 0.2
vmc
webカメラでキャラクターを動かします。
- vseeface
- webcam motion capture (vmcは有料)
webcam(vmc) -> vseeface(vmc) -> vrm4u(vmc)
- macbookのwebcam motion capture(有料機能)でvmc(外部アプリ)を送信します。この際、
ip:$windows,port:39539にしてください。
# cmd(pwsh)
$ ipinfo /all
192.168.11.30
この場合はip:192.168.11.30です。
- windowsのvseefaceで
一般設定 -> osc/vmcプロトコル -> 送信(127.0.0.1:39540), 受信(192.168.11.30:39539)にします。これをueに合わせます。
一般設定 -> osc/vmcプロトコル -> 送信(127.0.0.1:39540), 受信(192.168.11.30:39539)
- windowsからueのprojectを開いてabpでvrm(vmc)を設定します。
# vrm vmc
ip : 127.0.0.1
port : 39540
ABPを切り替えることで操作とモーションキャプチャができるようにしています。また、ABPのidleにvmcを追加してもいいかもしれません。この場合、キーを押す必要はありません。
- 入力でABPを切り替える方法
- ABPのidleにvmcを入れる方法
livelink
この方法の利点としてABP(idle)以外でも表情を有効にできます。例えば、ABP(run)しているときも表情の変化が有効になります。ただし、livelinkを切るとそのままの状態で固定されるため一度morphをリセットしないといけない。
- livelink face
- livelink
- apple arkit
- apple arkit face support
[vrm4u]
# https://github.com/ruyo/VRM4U/tree/master/Content/Util/Actor/latest
/Plugins/VRM4U/Content/Util/Actor/latest/BP_LiveLinkFace
/Plugins/VRM4U/Content/Util/Actor/latest/sub/BP_MocopiReoeiver
https://help.vicon.com/space/Unreal5Plugin16/14713547/Install+and+set+up+the+LiveLink+plugin
/VRM4U/Util/Actor/latest/BP_LiveLinkFaceをmapにおいて、live link subject -> iphone, target actor sk -> SK_$nameを設定します。
character(player)にlivelinkを当てるにはblueprintを編集する必要があります。characterのdirにでもBP_LiveLinkFaceをcopyしてBP_Player(CBP_Character)に追加します。
ここでBP_LiveLinkFace -> livelink subject -> iphoneをセットしておきます。
次にBP_LiveLinkFaceを以下のような形でsk_$nameに置き換えます。場所はコメントを参考にしてください。私の場合は見た目をカスタマイズしているので少し複雑です。
https://blueprintue.com/blueprint/pu_xl52s/
npc
NPCなどの会話や操作は音声とAIを使用します。
$ curl https://api.openai.com/v1/chat/completions \
  -H "Content-Type: application/json" \
  -H "Authorization: Bearer YOUR_API_KEY" \
  -d '{
    "model": "gpt-4o-mini",
    "messages": [{"role": "user", "content": "Your question here"}],
    "temperature": 0.7
  }'
$ curl -X POST "https://api.elevenlabs.io/v1/text-to-speech/VOICE_ID" \
     -H "xi-api-key: YOUR_API_KEY" \
     -H "Content-Type: application/json" \
     -d '{
           "text": "Hello world!",
           "model_id": "eleven_monolingual_v1",
           "voice_settings": {
             "stability": 0.5,
             "similarity_boost": 0.5
           }
         }' \
     --output output.mp3
mode system
キャラクターの変身を実装します。
https://blueprintue.com/blueprint/tmnb8cr6/
変身はmode system(モードシステム)に基づき構築されています。段階はanimal(動物) -> human(人型) -> divinity(神性)に分けられます。
attribute system
attribute system(属性システム)です。1キャラクターにつき1属性が割り当てられます。属性はキャラクターのgroup(グループ)で決まります。groupはseason(シーズン)で移行し、前に戻ることはありません。
"atom": {
      "name": "atom",
      "group": [
        "fantasy"
      ],
      "lang": {
        "ja": "原子"
      },
      "ref": "https://en.wikipedia.org/wiki/atom",
      "body": {
        "text": "the word atom comes from the greek word atmos, which means indivisible. an atom consists of an atomic nucleus, which is made up of protons and neutrons, and electrons distributed around the nucleus",
        "lang": {
          "ja": "アトムはギリシャ語のアトモス、これ以上分割できないという単語が由来。原子は陽子と中性子からなる原子核と、その周囲に分布する電子から構成される"
        }
      },
      "enum": [
        "proton",
        "neutron",
        "atomic",
        "electron",
        "quark"
      ]
}
flying speed
モードによって移動速度を変えます。カメラワークも調整します。
https://blueprintue.com/blueprint/1fwupsb8/
widget
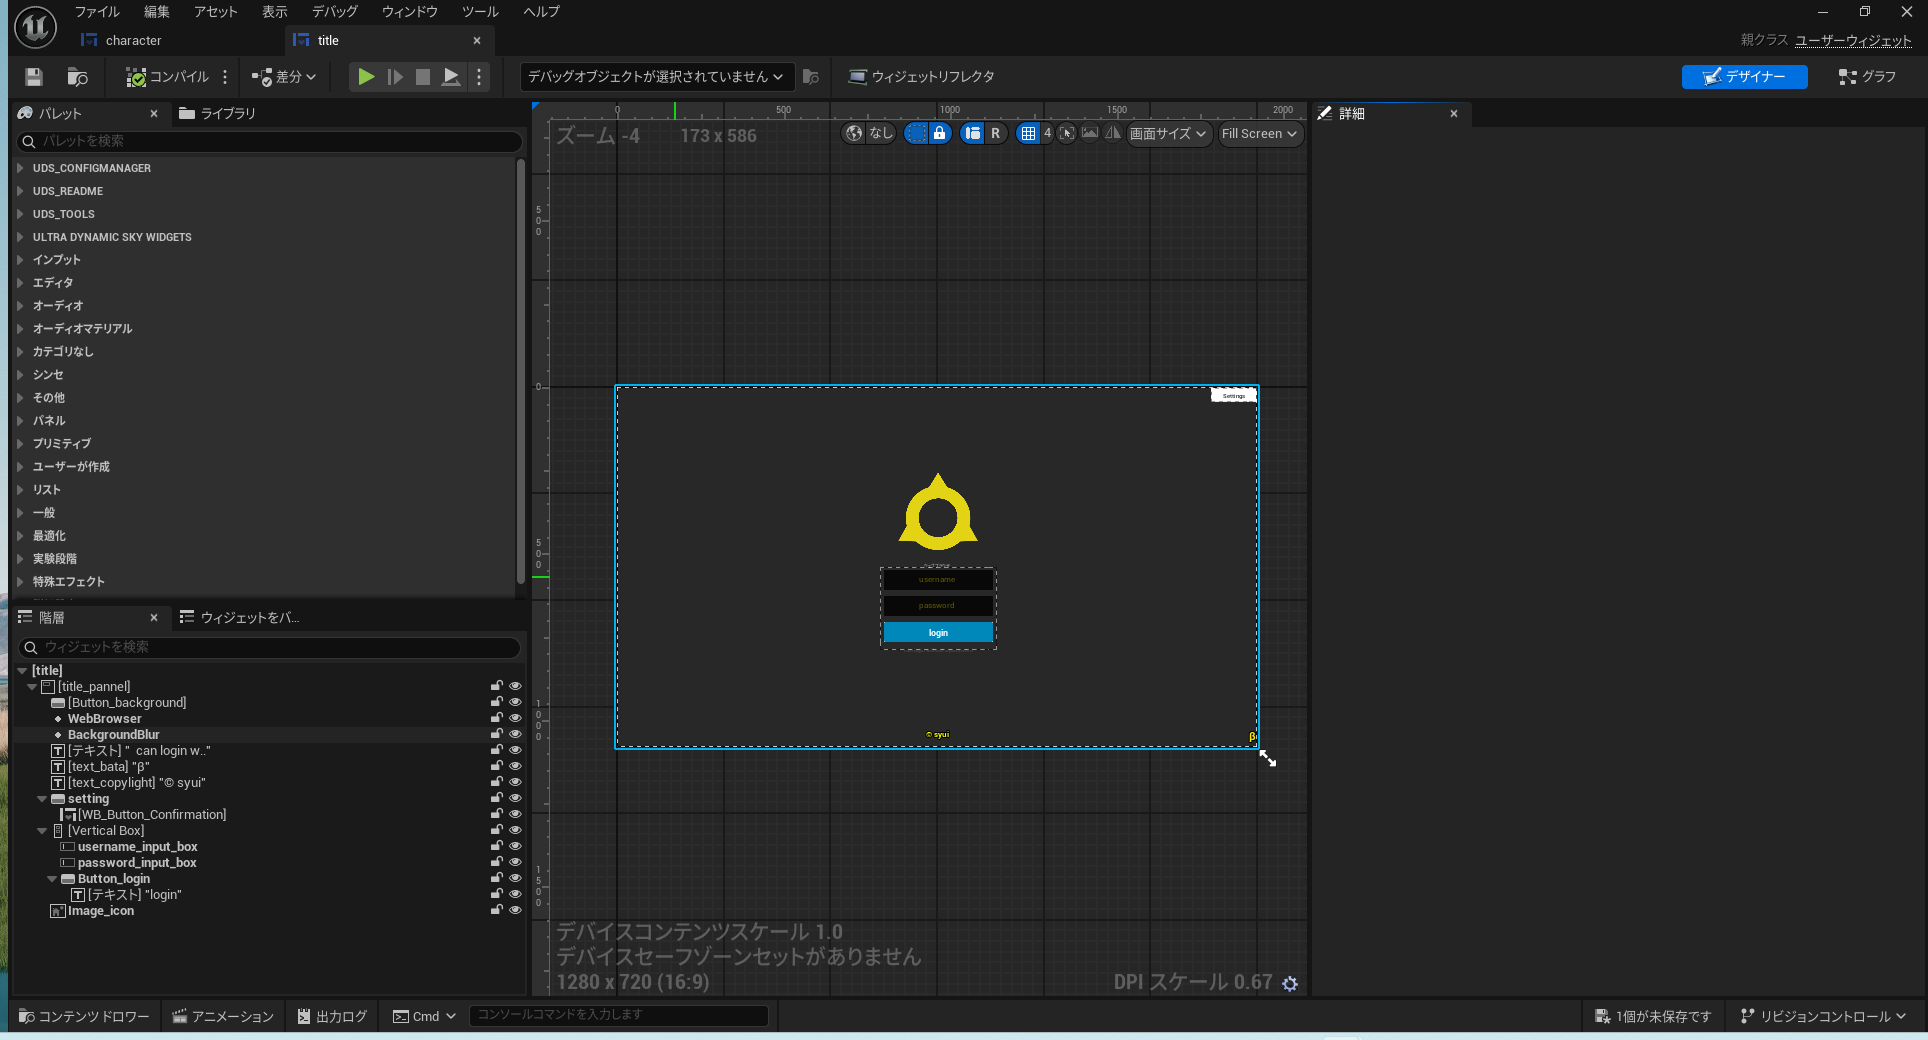
主にtitle, status, loginなどのuiを作ります。
title
主にapiからの情報を取得して、config instanceなどに入れます。
token情報がある場合はpasswordの入力欄を消す処理を入れます。passwordの入力は必須ではなく、自身のpdsに保存したい場合のみに限定します。通常はyui.syui.aiのpdsに保存されそこから取得されます。これはゲーム情報の改ざん防止のため必要です。
もしユーザーのpdsに保存した場合の活用法ですがyui.syui.aiのjsonとユーザーのpdsに保存されたjsonの一部をbase64に変換して一致を確認することでverifyとする予定です。
character select
GASの/Widgets/WidgetData/EUW_CharacterSelectButtonを参照します。ただし、開発用なのでそれをpackageでも使えるようにします。
https://blueprintue.com/blueprint/6ucrhtkc/
iconはobject nameから取りたいのですが、build後に変化してしまうので、どうしようか悩みます。
https://zenn.dev/pokotaro/books/43d02dab5b8000/viewer/301731
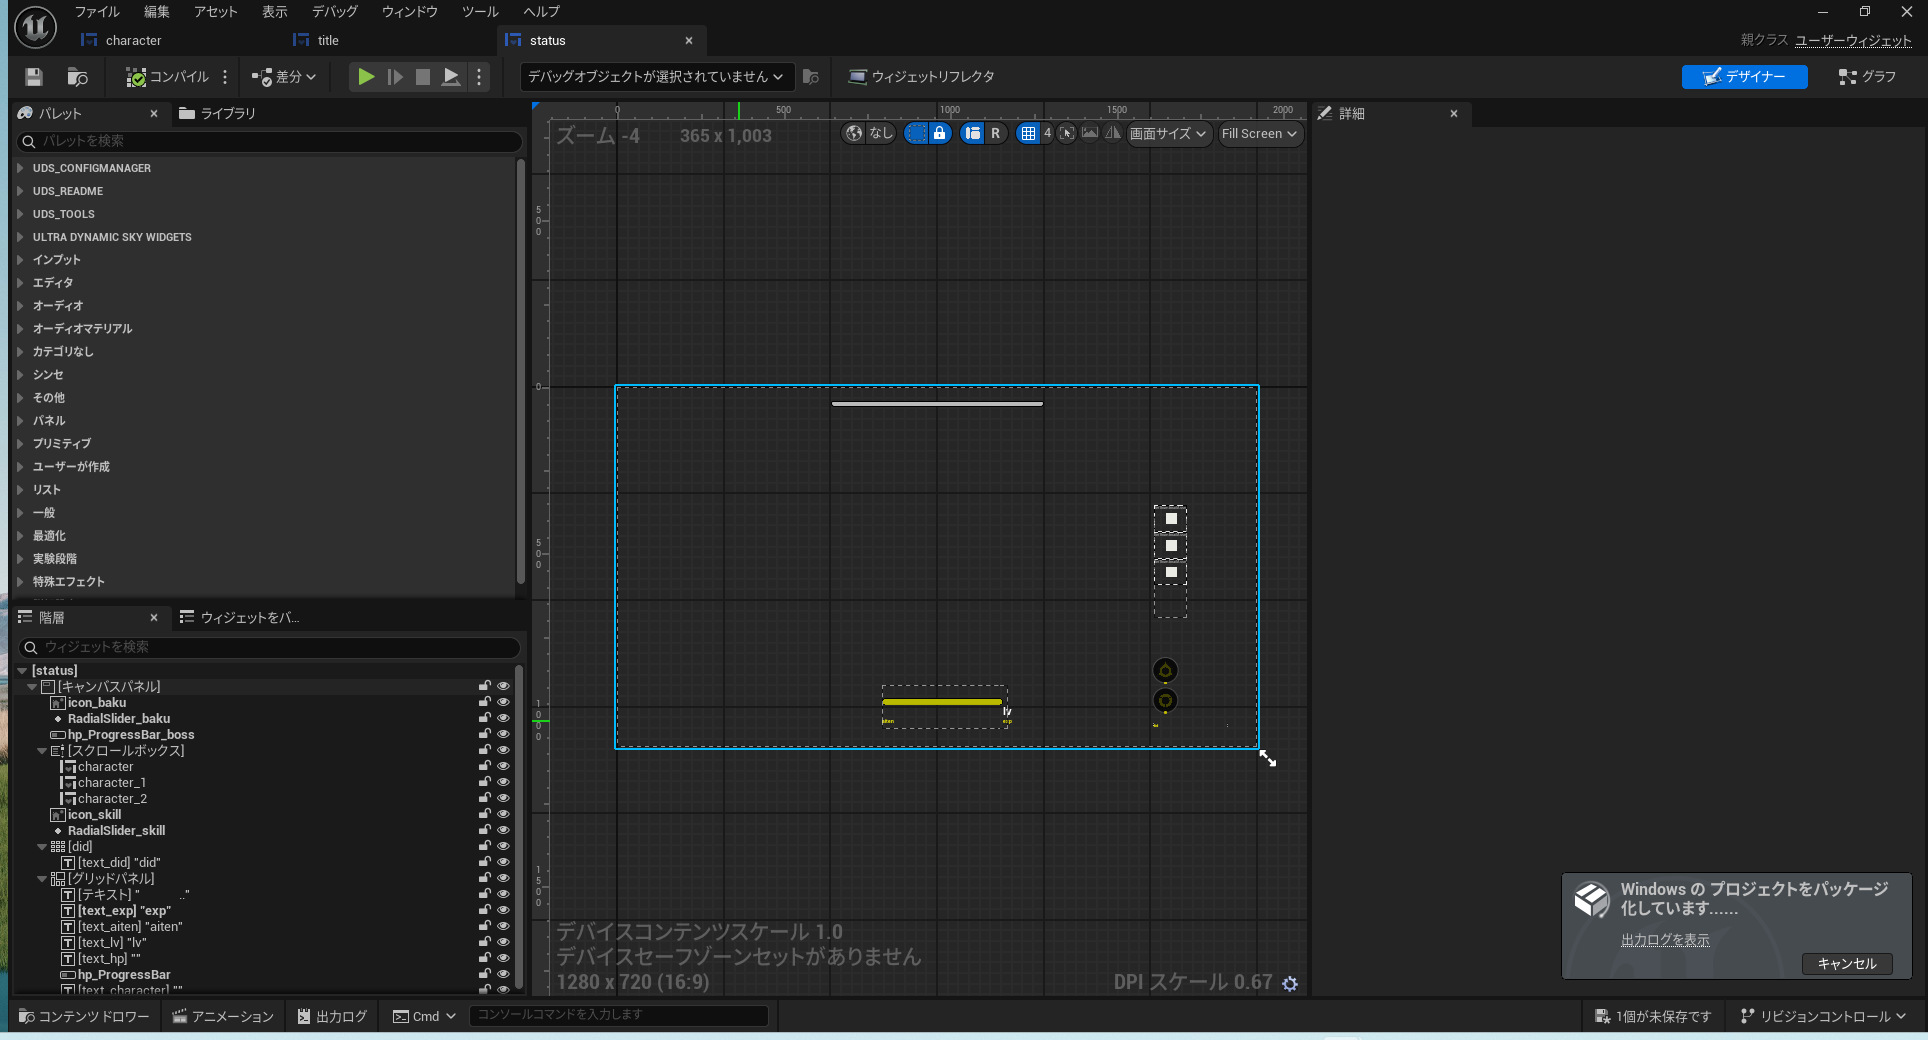
status
プレイヤーやキャラクターのステータスを表示します。なお、CBP_CharacterはEvent Beginではなぜか表示できません。したがって、関数を作ってEvent Tickに書きます。スキルを発動すると一定時間使えなくなります。
https://blueprintue.com/blueprint/ydbtzm73/
https://blueprintue.com/blueprint/ppdg-fb-/
playerstart
移動したい場所にplayerstartを設置してボタンで移動できるようにします。
https://blueprintue.com/blueprint/3h8qi0ep/
battle
バトルシステムの構築を目指します。GAS(gameplay ability system)というものがあります。
spaceship
spaceship battle system、つまり、宇宙船を用意して戦闘ができるようにします。これは最初に購入したSpace Frontier Stations & Shipsを使います。使い方は難しいのですが、色々と応用できるのでspaceship関連では結構おすすめです。
docsを見てください。簡単に説明すると、/SpaceStation/Blueprints/Weapons/BP_${type}を設置して使います。これは/SpaceStation/Blueprints/Weapons/Parent/BP_ParentTurretを基本に構築されています。ターゲットになるactorにAllow Shooting, ShootingTargetというタグをつけてください。これで追跡されるようになります。BPの設定でweapon -> shooting delayを小さくしてみます。すると弾丸が発射される感覚が短くなります。
- gatling(ガトリング), laser( レーザー), missile(ミサイル)
- OverlapDetection(範囲)
- shooting delay(発射速度) :
0.2 - actor-tags :
Allow Shooting,ShootingTarget
BGMを鳴らすには同じくタグを利用します。まずは/BP_ParentTurretにBGMを追加して、以下のよう組みます。
https://blueprintue.com/blueprint/d6i7du0s/
niagara
niagaraにcollisionを設定してeventを取得する方法です。これは非常に複雑ですが、以下の記事が役に立ちます。
https://qiita.com/O_Y_G/items/d696d01b17250dccc273
例えば、hitした箇所に爆発を起こす設定は以下の通り。
https://blueprintue.com/blueprint/h2ktbf6-/
現在、遠い場所での戦闘にダメージが入らない問題があります。 これは距離(座標)が0から1048535を超えた場所ではvectorの値が正確に取れないことが要因だと思われます。 #56
item
敵が消滅したあとにアイテムをドロップする処理はNiceInteractionSystemを使います。
使い方は簡単でGame Modeに以下を追加します。
Player Controller Class:/NiceInteractionSystem/Blueprints/Components/AC_PC_InteractionGame State Class:/NiceInteractionSystem/Blueprints/Components/AC_GS_Interaction
その他にCBP_SandboxCharacterにクラス設定からインターフェイス追加でBPI Interaction Notifierなどを追加して使うのもいいかもしれません。
ただし、キャラの切り替えにはまだ対応していません。 #54
atmosphere
atprotoを利用したマルチプレイのゲームの仕組みを解説。
atproto
ゲームのアカウントはatを利用し、ゲームデータはpdsに保存されます。
まずoauthするとyui.syui.aiのai.syui.game.userにアカウントが作成されます。
このat-uriをplayerのai.syui.gameに書き込みます。
1. [yui] at://yui.syui.ai/ai.syui.game.user/syui
2. [user] at://syui.ai/ai.syui.game/self
api
varestを使うのが一般的です。ただし、patchがなかったりと色々あるので、http-websocket-helperがおすすめです。jsonはjsonparserがオススメです。
使い方はblueprintueで検索してください。
refresh token
varestの場合はContent-Typeにx_www_form_urlencoded_urlを指定します。
https://blueprintue.com/blueprint/4yf7viyt/
playerはoauthしているとき[yui]ai.syui.game.loginと[yui]ai.syui.game.user:limitを見ます。どちらもfalseならHTMLにplay、trueがある場合はliveを出力します。loginするとlimitにdayが書き込まれます。
3. [yui] at://yui.syui.ai/ai.syui.game.login/self
logoutはゲーム内のtime:m5かbuttonで処理され、[yui]ai.syui.game.loginに書き込みます。
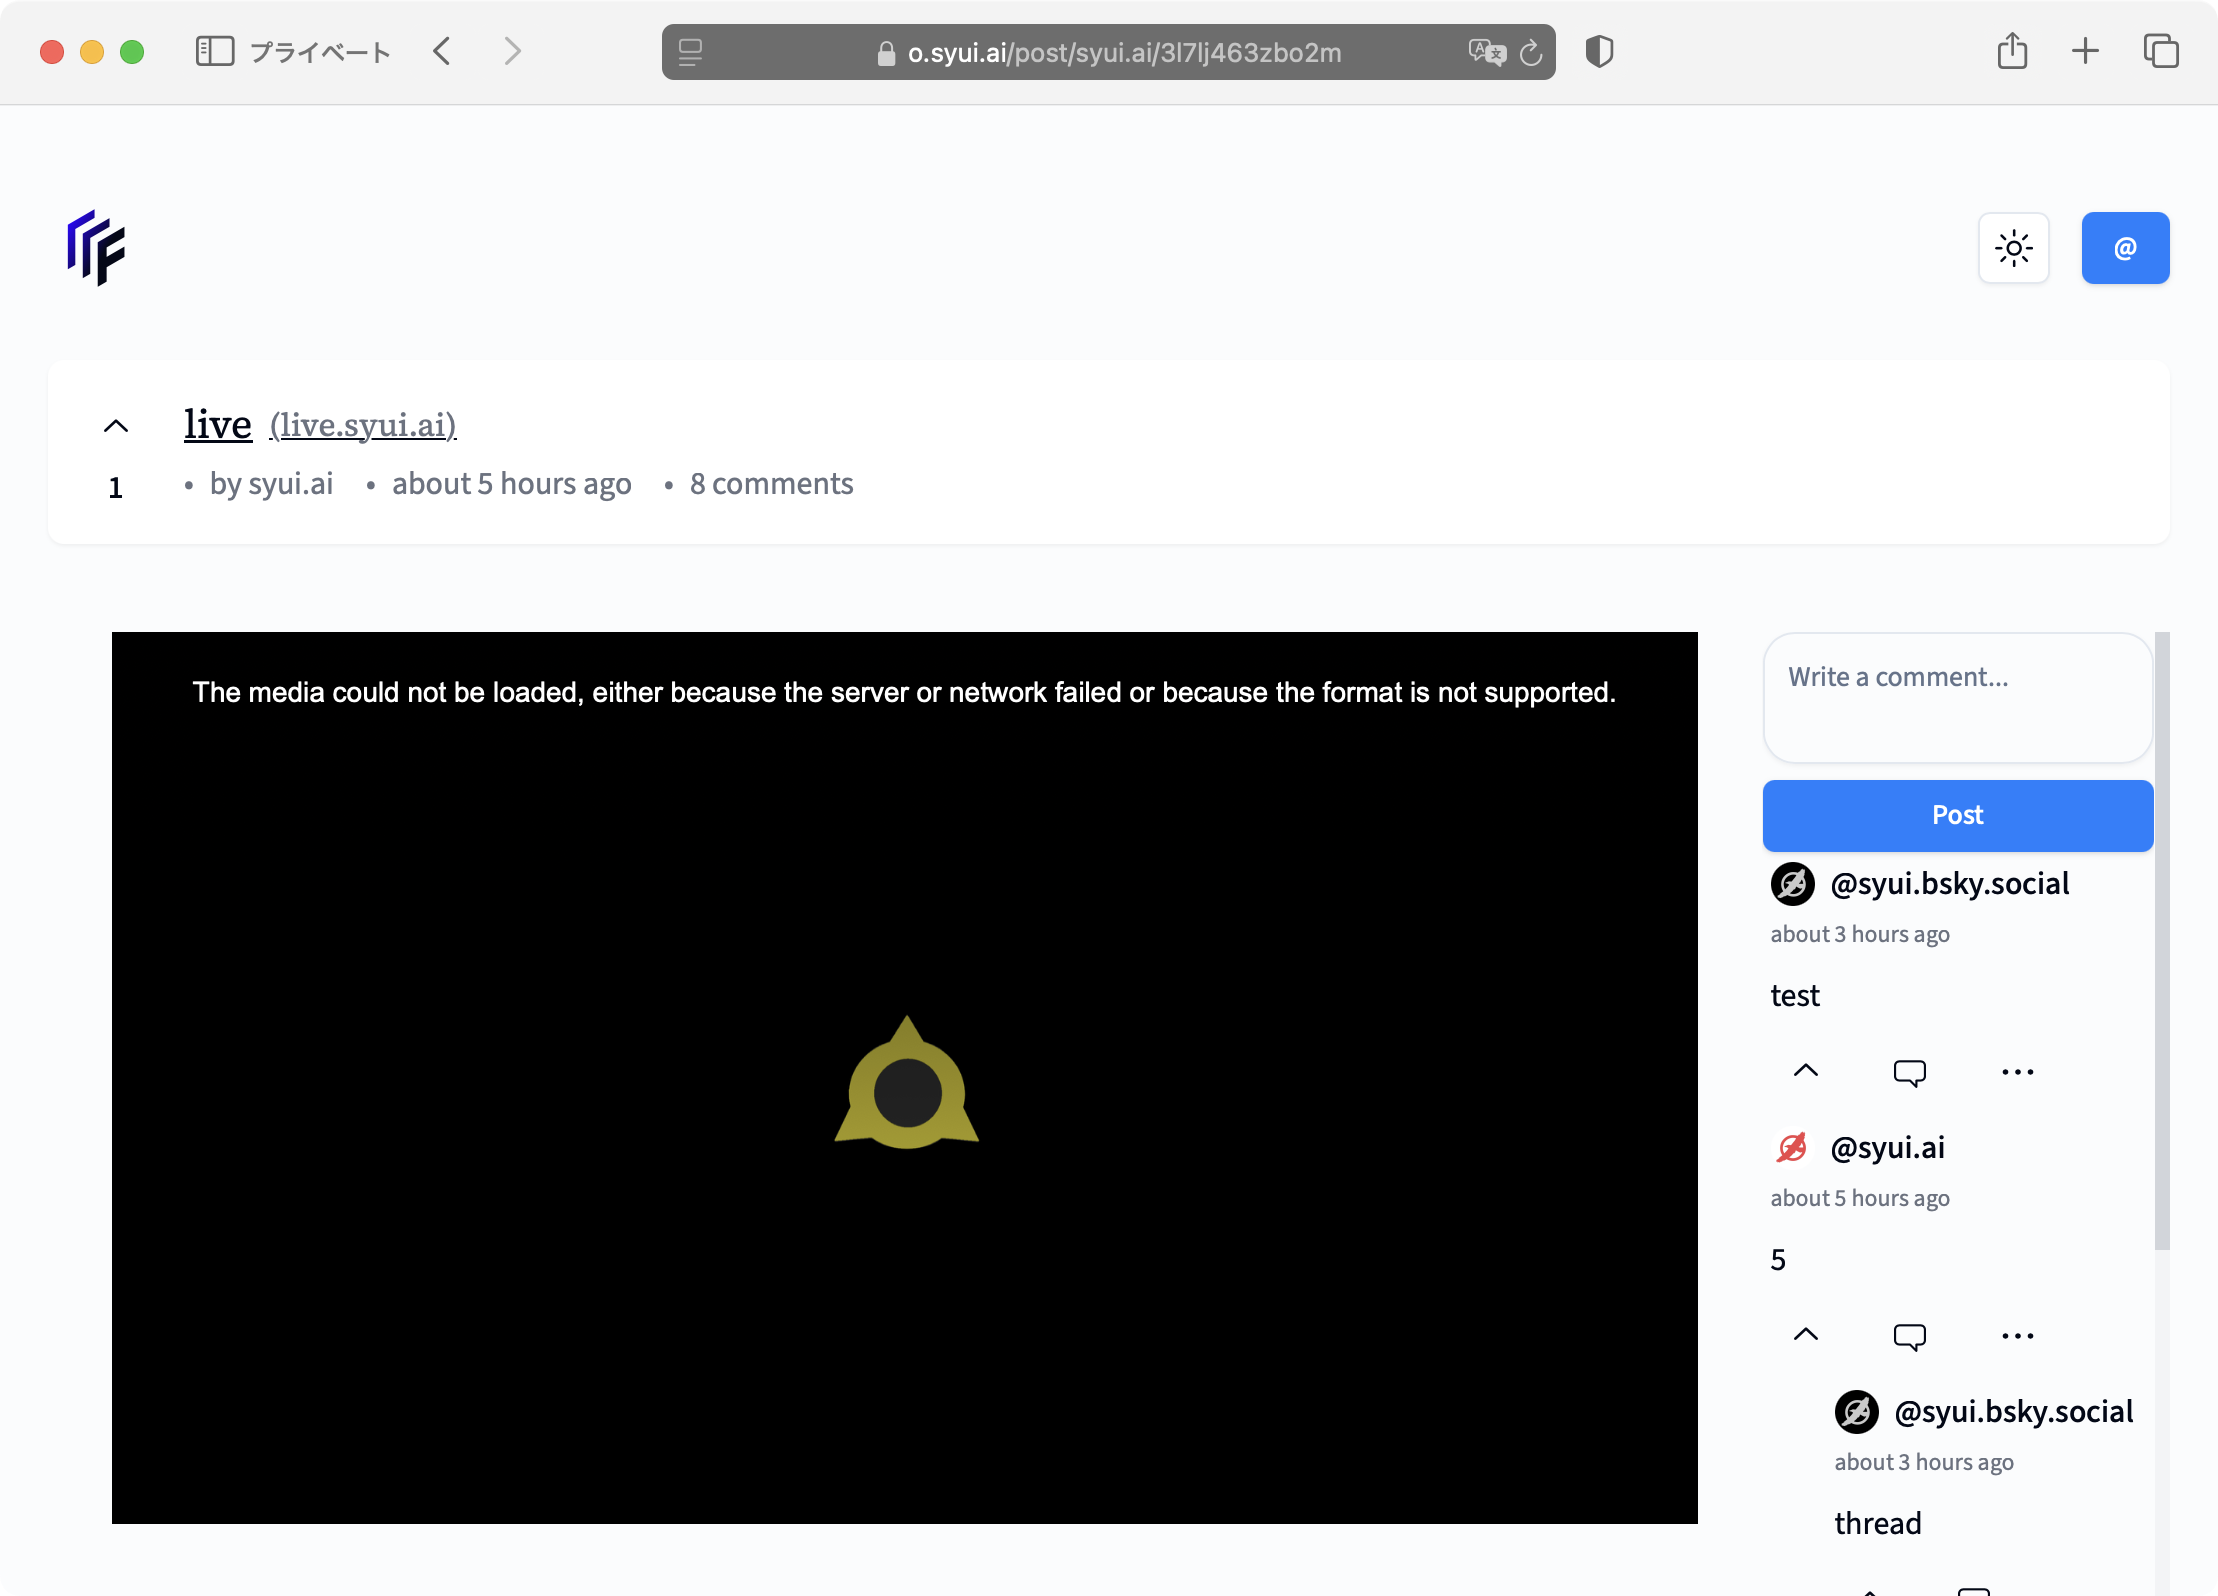
frontpage
restreamerのat(oauth)にはfrontpageを使います。
frontpageはatprotoを使って投稿の制御を行います。主にpdsのcollectionから検索とat://を使います。
next.jsで書かれています。layoutはtailwindcssです。
build & deploy
https://git.syui.ai/ai/ue/src/branch/main/github/frontpage
tailwindcss
htmlに省略形式でcssを記述します。tailwind.config.tsを見てください。
{params.postAuthor === "syui.ai" && post.status === "live" && post.rkey === "3l7lj463zbo2m" && (
    <div className="flex py-10 max-h-[700px] md:h-screen">
         <iframe className="w-full hidden-scrollbar px-0 h-[300px] sm:h-[450px] md:px-0 md:h-[600px] md:px-8" title="stream" src="https://example.com">
        </iframe>

      <div className="hidden w-64 hidden-scrollbar md:block md:overflow-y-scroll
      max-h-[600px]
      [&::-webkit-scrollbar]:w-2
      [&::-webkit-scrollbar-track]:bg-gray-100
      [&::-webkit-scrollbar-thumb]:bg-gray-300
      dark:[&::-webkit-scrollbar-track]:bg-neutral-700
      dark:[&::-webkit-scrollbar-thumb]:bg-neutral-500">
      <LinkAlternateAtUri
        authority={authorDid}
        collection={PostCollection}
        rkey={post.rkey}
      />
        <NewComment postRkey={post.rkey} postAuthorDid={authorDid} />
      {comments.map((comment) => (
        <Comment
          key={comment.id}
          comment={comment}
          level={0}
          postAuthorParam={params.postAuthor}
          postRkey={post.rkey}
        />
      ))}
      </div>
    </div>
)}
@mediaを制御するsm, mdなどは記述する順序を間違えると動きませんので注意。
はみ出す
- w-full
+ overflow-hidden whitespace-nowrap
hugo
hugoのcomment systemにも利用できます。
{{ if .Param "comment" }}
<div class="comment">
	<p><a href="https://example.com/post/syui.ai/{{ .Params.comment }}" class="frontpage-button"> @comment </a></p>
	<iframe class="frontpage" src="https://example.com/post/syui.ai/{{ .Params.comment }}" frameBorder="0" SRC=""></iframe>
</div>
{{ end }}
post.mdにcommentを追加します。
+++
title = "atprotoのfrontpageを触ってみる"
date = "2024-10-26"
[params]
  comment = "3l7lprmoka22r"
+++
iframe.frontpage {
	width:100%;
	height: 1000px;
	pointer-events:none;
}

a.frontpage-button {
	width:100%;
	font-size: 15px;
	background-color: #e80063;
	/* background-color: #007fff; */
	color: #fff;
	border: 2px solid #fff;
	padding: 10px 30px;
	border-radius: 5px;
	text-decoration: none;
}

a.frontpage-button:hover {
	/* background-color: #0077ff; */
	background-color: #e80073;
}
pixel streaming
- https://dev.epicgames.com/documentation/ja-jp/unreal-engine/unreal-engine-pixel-streaming-reference
- https://dev.epicgames.com/documentation/en-us/unreal-engine/pixel-streaming-2-overview-in-unreal-engine
docs : https://github.com/EpicGames/PixelStreamingInfrastructure/tree/master/Frontend/Docs
# https://github.com/EpicGamesExt/PixelStreamingInfrastructure
$ mkdir -p ~/git && cd ~/git
$ git clone https://github.com/EpicGamesExt/PixelStreamingInfrastructure

$ cd ~/git/PixelStreamingInfrastructure/Matchmaker/platform_scripts/cmd/
$ ./setup.bat
$ ./run.bat
# https://dev.epicgames.com/documentation/ja-jp/unreal-engine/unreal-engine-pixel-streaming-reference
# --HttpPort 90
# --MatchmakerPort 9999

# Signaling and Web サーバーに対する次のコンフィギュレーション パラメータを設定します。
$ cd ~/git/PixelStreamingInfrastructure/SignallingWebServer/platform_scripts/cmd/
$ ./setup.bat
$ ./Start_SignallingServer_nopublic.ps1 --UseMatchmaker true --MatchmakerAddress 127.0.0.1 --MatchmakerPort 9999 --PublicIp localhost --HttpPort 80
Matchmakerを使わないと操作が共通になります。したがって、Matchmakerを使って各ユーザーが使用するStreamerIdを選択して別々のstackにアクセスするようにします。
urlはhttp://127.0.0.1/?StreamerId=DefaultStreamer, http://127.0.0.1/?StreamerId=DefaultStreamer1という形になります。このidは起動しているアプリの数だけ生成されます。
ただ、アプリの起動数が多すぎるとserverの負荷が大きくなります。
これを外部につなげる場合はcloudflare tunnelなどを使いましょう。
err
webrtc connection negotiated
このように表示される場合はipを変えてください。同じnetwork内だとうまくいかない場合があります。
option
https://dev.epicgames.com/documentation/en-us/unreal-engine/unreal-engine-pixel-streaming-reference
disable player controller
playerのcontrollerを無効にして配信のみにする方法です。
    const config = new Config({ useUrlParams: true });
	config.setFlagEnabled(Flags.MouseInput, false);
	config.setFlagEnabled(Flags.KeyboardInput, false);
	config.setFlagEnabled(Flags.TouchInput, false);
	config.setFlagEnabled(Flags.GamepadInput, false);
	config.setFlagEnabled(Flags.XRControllerInput, false);

	const stream = new PixelStreaming(config);
もしくはSignallingWebServer/Public/player.jsの以下の箇所を探してfalseにします。そして、settingを呼び出せないようにします。
this.flags.set(Flags.KeyboardInput, new _SettingFlag__WEBPACK_IMPORTED_MODULE_2__.SettingFlag(Flags.KeyboardInput, 'Keyboard input', 'If enabled, send keyboard events to streamer', false, useUrlParams));
this.flags.set(Flags.MouseInput, new _SettingFlag__WEBPACK_IMPORTED_MODULE_2__.SettingFlag(Flags.MouseInput, 'Mouse input', 'If enabled, send mouse events to streamer', false, useUrlParams));
this.flags.set(Flags.TouchInput, new _SettingFlag__WEBPACK_IMPORTED_MODULE_2__.SettingFlag(Flags.TouchInput, 'Touch input', 'If enabled, send touch events to streamer', false, useUrlParams));
this.flags.set(Flags.GamepadInput, new _SettingFlag__WEBPACK_IMPORTED_MODULE_2__.SettingFlag(Flags.GamepadInput, 'Gamepad input', 'If enabled, send gamepad events to streamer', false, useUrlParams));
this.flags.set(Flags.XRControllerInput, new _SettingFlag__WEBPACK_IMPORTED_MODULE_2__.SettingFlag(Flags.XRControllerInput, 'XR controller input', 'If enabled, send XR controller events to streamer', false, useUrlParams));
multiplayer
pixel streamingとcallab viewerやvagon streamを使用すると実現できるかもしれません。
- https://vagon.io/blog/how-to-create-multiplayer-unreal-engine-experiences
- https://github.com/make-live/multiplayer
OnlineSubsystem
OnlineSubsystemを用いた方法です。これはpixelstreamingで動作します。様々なプラットフォームに対応しているようです。
- plugin : OnlineSubsystem
- https://tech.dentsusoken.com/entry/onlinemultiplay-cpp
- https://dev.epicgames.com/documentation/ja-jp/unreal-engine/online-subsystem-in-unreal-engine
今回使用するSteamDevAppIdは480となっております。これはSteamから開発用に提供されているサンプルゲーム(SpaceWar)のIDです。本番開発で用いる場合は、自身でAppIdを取得する必要がありますのでご注意ください。
記事ではsteamのapp idを使って、steamアカウントを使用する前提で解説されています。ユーザーはsteamアカウントでログインします。手順としてはまずsteamの開発者用のアカウントを作り、app idを取得、それを使ってclientのようなものを作るのだと思います。このpluginはそのためのsdkのようなものでしょう。
pixelstreamingで実現するmultiplayはissueに情報をまとめていきます。 #58
pixel streaming(PS) ext plugin
superhero fligth animationsを出しているところがやっているのがlocal multiplayerのpixel streamingで、一つのアプリ起動で複数人にcamera, controllerを割り当てる。plugin自体はまだ非公開。
- https://www.docswell.com/s/indieusgames/5EXLLJ-2024-10-23-164940
- https://leon-gameworks.connpass.com/event/328282/
- https://x.com/tarava777/status/1857382063818645792
Eagle 3D Streaming
- https://github.com/e3ds
- https://www.eagle3dstreaming.com/demo/
- https://iframe_react.eagle3dstreaming.com/
restreamer
$ git clone https://github.com/datarhei/restreamer
$ cd restreamer
$ docker compose up
services:

  restreamer:
    image: datarhei/restreamer
    #image: datarhei/restreamer:cuda-latest
    ports:
      - 8080:8080
      - 1935:1935
      - 6000:6000/udp
    restart: always
    volumes:
      - ./data/config:/core/config
      - ./data/data:/core/data
なるべくrtmpではなくsrtを使用してください。rtmpのport:1925に関しては使わないなら閉じても構いません。
account system
EOS (Epic Online Service)
- https://dev.epicgames.com/documentation/ja-jp/unreal-engine/hosting-and-networking-guide-for-pixel-streaming-in-unreal-engine
- https://onlineservices.epicgames.com/ja/services
- https://eoscore.eeldev.com/
- plugin : https://www.fab.com/ja/listings/8e78818d-4662-4c6d-8ab2-6e22b9d3595e
- plugin : https://github.com/mordentral/AdvancedSessionsPlugin
